Chicken Biryani Kerala Style
Hey everyone, I hope you're having an amazing day today. Today, we're going to make a special dish, Chicken Biryani Kerala Style. One of my favorites. For mine, I will make it a bit unique. This is gonna smell and look delicious.
Chicken Biryani Kerala Style is one of the most popular of recent trending foods in the world. It is simple, it's fast, it tastes delicious. It is appreciated by millions every day. Chicken Biryani Kerala Style is something which I have loved my entire life. They are nice and they look wonderful.
Many things affect the quality of taste from Chicken Biryani Kerala Style, starting from the type of ingredients, then the selection of fresh ingredients, the ability to cut dishes to how to make and serve them. Don't worry if you want to prepare Chicken Biryani Kerala Style delicious at home, because if you already know the trick then this dish can be used as an extraordinary special treat.
As for the number of servings that can be served to make Chicken Biryani Kerala Style is 4-serving. So make sure this portion is enough to serve for yourself and your beloved family.
Just in addition, the time it takes to cook Chicken Biryani Kerala Style estimated approx 90 mins.
To begin with this particular recipe, we have to first prepare a few components. You can cook Chicken Biryani Kerala Style using 24 ingredients and 14 steps. Here is how you can achieve that.
A recipe borrowed from my aunt.
Slight variation from the traditional Kerala chicken biryani but uses pretty much the same ingredients.
Takes a bit of time and effort but the result is worth it. :)
Ingredients and spices that need to be Take to make Chicken Biryani Kerala Style:
- 1 Kilo Chicken ( cut into medium - sized pieces )
- 4 Onions Large (sliced lengthwise)
- 2 Tomatoes Large (diced)
- 1 Tablespoon Garlic ( ground to fine paste )
- 3/4 Tablespoon Ginger ( ground to fine paste )
- 6 - 7 Green chillies chopped (or as per taste)
- 2 Cups Coriander leaves ( chopped )
- 1 Cup Mint leaves ( chopped )
- 1/2 Cup Yoghurt Curd Dahi / Set / Set
- 2 Teaspoons Garam Masala powder
- (slightly crushed) 6 Pods Cardamom
- 6 Cloves
- 2 Cinnamon stick ( small size )
- 5 Black pepper Seeds ( slightly crushed)
- 1 Tablespoon Coriander powder
- 1/2 Tablespoon Turmeric powder
- 2 Tablespoons Chilli powder ( or as per taste )
- 4 Tablespoons Cooking oil ( I used refined sunflower oil )
- 6 Tablespoons Ghee
- 1 lemon Slice of
- To Taste Salt
- 3 Cups Rice (Jeera )
- 25 Grams Cashewnuts chopped
- 25 Grams Raisins
Steps to make to make Chicken Biryani Kerala Style
- Heat the cooking oil in a vessel. Add in 3/4th of the sliced onions and all of the chopped green chillies with a pinch of salt and saute till onions are light brown in color. (Tip :Salt aids in quickening the process of browning the onions).
- Now add in the garlic paste, ginger paste and the diced tomatoes. Once the raw smell of garlic and ginger is gone, add in 1 cup of chopped coriander leaves and 1/2 a cup of chopped mint leaves and leave for a min.
- Now add in the masalas - turmeric powder, chilli powder, coriander powder and one spoon of garam masala powder. (It's best to make a paste of the masalas with a little bit of water and then add the paste in).
- Add in the whole spices - 3 cardamom pods, 3 cloves, a cinnamon stick and 3 black pepper seeds and mix well. When you see an oil layer floating on the top, it indicates the masala is cooked.
- Now you add in the yoghurt / set curd / set dahi. Mix well and let it heat a bit but do not bring it to a boil.
- Add in the cut chicken pieces and coat each piece well with the masala. Reduce flame, cover and cook for about 30 min. (If you are using a pressure cooker, keep it for a whistle). The chicken masala should be in a semi-paste form.
- Paralelly, while the masala is busy being ready, soak the rice in water with salt for about 20 min.
- In another vessel (which will be used to cook rice), bring water to boil. Add in the remaining mint leaves, coriander leaves, cardamom pods, cloves, cinnamon stick, crushed pepper seeds, salt and the lemon slice.
- Add in 2 tbsp of ghee to the boiling water and the pre-soaked rice. Cook on medium flame and bring it to a semi-cooked stage (8-10 min). Drain and keep the rice aside. (Tip: Grate about 1/2 a carrot into the water alongwith the rice. Not only does it give color, but adds to the flavor as well)
- In a frying pan, heat 2 tablespoon of ghee and add in the remaining sliced onions. When they start to turn brownish, add in the chopped cashew and raisins. Sprinkle the remaining garam masala powder and salt on top of it all, mix well, and turn off the heat once cashews start changing color.
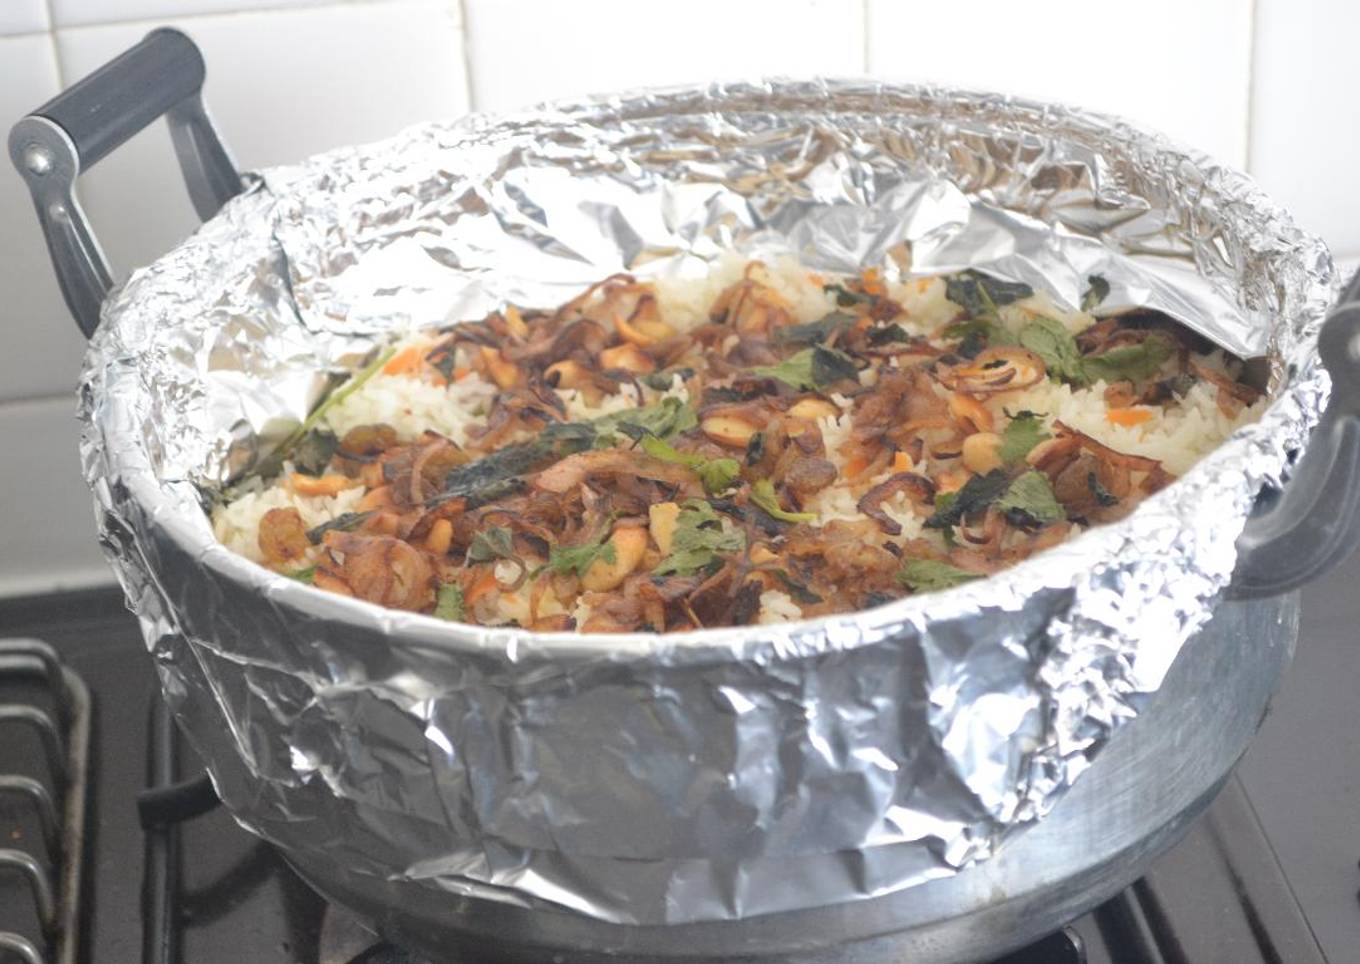
- In a large aluminum vessel, spread about a tablespoon ghee on the bottom. Layer about a half of the semi-cooked rice on top of the ghee. Sprinkle half of the fried onion-cashew mixture on top of this layer.
- Layer the chicken masala prepared earlier on top of the rice layer. Dump the remaning semi-cooked rice on top of the chicken masala layer. Sprinkle the remaining fried onion-cashew mixture on top alongwith the remaining ghee. Add few coriander and mint leaves as well.
- Cover the vessel with a lid. It should be tightly closed so as not to let any steam escape. This can be done either by using an aluminium foil paper and wrapping around the lid area or using a dough made of plain flour/ all - purpose flour / maida.
- Place the vessel on stove on medium flame for about 2-3 min. Reduce the flame and keep it for 20-30 min. Remove from heat and serve hot.
As your experience and confidence expands, you will certainly discover that you have a lot more natural control over your diet and adapt your diet to your personal preferences in time. Whether you intend to serve a dish that utilizes fewer or more active ingredients or is a little essentially zesty, you can make basic modifications to accomplish this goal. Simply put, start making your recipes on schedule. When it comes to fundamental food preparation abilities for newbies you do not need to discover them but just if you understand some simple cooking methods.
This isn't a full overview to quick and simple lunch recipes but its excellent food for thought. Hopefully this will obtain your imaginative juices flowing so you can prepare scrumptious meals for your family members without doing too many heavy meals on your journey.
So that's going to wrap this up for this special food Steps to Make Award-winning Chicken Biryani Kerala Style. Thank you very much for your time. I am sure that you can make this at home. There is gonna be more interesting food in home recipes coming up. Remember to bookmark this page on your browser, and share it to your family, colleague and friends. Thanks again for reading. Go on get cooking!


Comments
Post a Comment